Configuring Kanzi Engine plugin custom components for Kanzi Studio
To make the content of your Kanzi Engine plugin available to users in Kanzi Studio, you can set how Kanzi Studio shows your custom components and lets users interact with them.
You can:
Creating custom nodes and property types
You can create in your Kanzi Engine plugin custom nodes with custom property types. To make your custom components available to users in Kanzi Studio, you can set how Kanzi Studio shows and lets users interact with them.
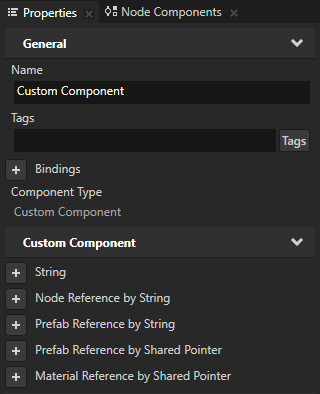
For example, to create a custom 3D node Custom Component with custom property types that provide references to nodes and resources of a specific type:
- In the .hpp file of your Kanzi Engine plugin project, replace
    KZ_METACLASS_BEGIN(MyPlugin, Node3D, "CustomComponentType");
    KZ_METACLASS_END();
with
    // String property
    static PropertyType<string> StringProperty;
    // String reference to a node
    static PropertyType<string> NodeRefByStringProperty;
    // String reference to a prefab
    static PropertyType<string> PrefabRefByStringProperty;
    // Shared pointer reference to a prefab
    static PropertyType<ResourceSharedPtr> PrefabRefBySharedPtrProperty;
    // Shared pointer reference to a material
    static PropertyType<ResourceSharedPtr> MaterialRefBySharedPtrProperty;

    KZ_METACLASS_BEGIN(MyPlugin, Node3D, "Custom Component");
        // Add the property types to the class metadata
        KZ_METACLASS_PROPERTY_TYPE(StringProperty);
        KZ_METACLASS_PROPERTY_TYPE(NodeRefByStringProperty);
        KZ_METACLASS_PROPERTY_TYPE(PrefabRefByStringProperty);
        KZ_METACLASS_PROPERTY_TYPE(PrefabRefBySharedPtrProperty);
        KZ_METACLASS_PROPERTY_TYPE(MaterialRefBySharedPtrProperty);
    KZ_METACLASS_END();
- In the .cpp file of your Kanzi Engine plugin project, declare the metadata for the custom property types. See Reference for showing Kanzi Engine plugin custom types in Kanzi Studio.
The examples below use the displayName and valueProvider metadata attributes which set for the property types a Kanzi Studio display name and the source of the possible values that Kanzi Studio lets the user select from. For an example with more metadata, see Setting custom property and message types.
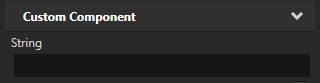
For example, to declare the metadata for the custom property types you created in the previous step:- String property with a one-line text editor:
// Creates a basic string property.
// If you do not set the editor, Kanzi Studio uses a simple Text editor.
PropertyType<string> MyPlugin::StringProperty(kzMakeFixedString("MyPlugin.String"), "", 0, false,
                                              KZ_DECLARE_EDITOR_METADATA
                                              (
                                                  metadata.displayName = "String";
                                              ));
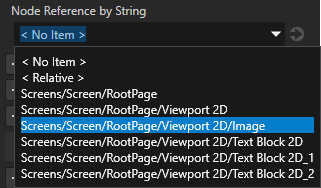
- String reference to a 2D node the user can select from a dropdown menu:
// Creates a string reference to a node.
PropertyType<string> MyPlugin::NodeRefByStringProperty(kzMakeFixedString("MyPlugin.NodeRefByString"), "", 0, false,
                                                       KZ_DECLARE_EDITOR_METADATA
                                                       (
                                                           metadata.displayName = "Node Reference by String";
                                                           // When you set valueProvider to ProjectObject:Node2D,
                                                           // Kanzi Studio automatically uses the Node 2D selector editor.
                                                           metadata.valueProvider = "ProjectObject:Node2D";
                                                       ));
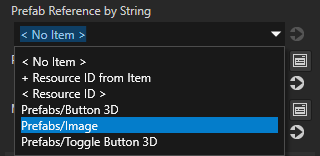
- String reference to a prefab the user can select from a dropdown menu:
// Creates a string reference to a prefab resource.
PropertyType<string> MyPlugin::PrefabRefByStringProperty(kzMakeFixedString("MyPlugin.PrefabRefByString"), "", 0, false,
                                                         KZ_DECLARE_EDITOR_METADATA
                                                         (
                                                             metadata.displayName = "Prefab Reference by String";
                                                             // When you set valueProvider to ProjectObject:PrefabTemplate,
                                                             // Kanzi Studio automatically uses the Prefab template selector editor.
                                                             metadata.valueProvider = "ProjectObject:PrefabTemplate";
                                                         ));
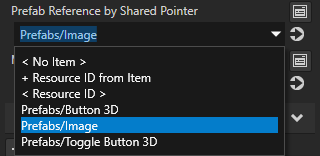
- Shared pointer reference to a prefab resource the user can select from a dropdown menu:
// Creates a shared pointer reference to a prefab resource.
PropertyType<ResourceSharedPtr> MyPlugin::PrefabRefBySharedPtrProperty(kzMakeFixedString("MyPlugin.PrefabRefBySharedPtr"), ResourceSharedPtr(), 0, false,
                                                                       KZ_DECLARE_EDITOR_METADATA
                                                                       (
                                                                           metadata.displayName = "Prefab Reference by Shared Pointer";
                                                                           // When you set valueProvider to ProjectObject:PrefabTemplate,
                                                                           // Kanzi Studio automatically uses the Prefab template selector editor.
                                                                           metadata.valueProvider = "ProjectObject:PrefabTemplate";
                                                                       ));
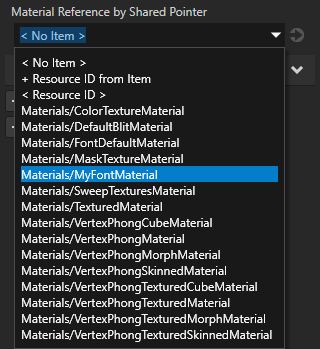
- Shared pointer reference to a material resource the user can select from a dropdown menu:
// Creates a shared pointer reference to a material resource.
PropertyType<ResourceSharedPtr> MyPlugin::MaterialRefBySharedPtrProperty(kzMakeFixedString("MyPlugin.MaterialRefBySharedPtr"), ResourceSharedPtr(), 0, false,
                                                                 KZ_DECLARE_EDITOR_METADATA
                                                                 (
                                                                     metadata.displayName = "Material Reference by Shared Pointer";
                                                                     // When you set valueProvider to ProjectObject:Material,
                                                                     // Kanzi Studio automatically uses the Material dropdown editor.
                                                                     metadata.valueProvider = "ProjectObject:Material";
                                                                 ));
- Build and install your plugin. See Adding a Kanzi Engine plugin to a Kanzi Studio project.
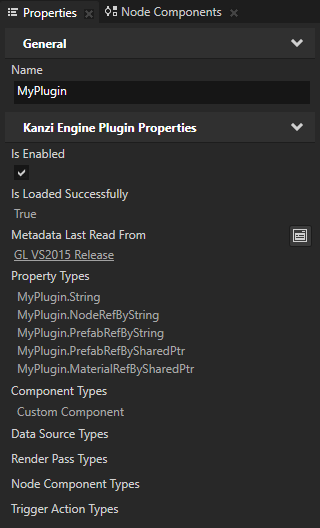
- In Kanzi Studio in the Library > Kanzi Engine Plugins select your plugin. In the Properties you can see the custom property types.
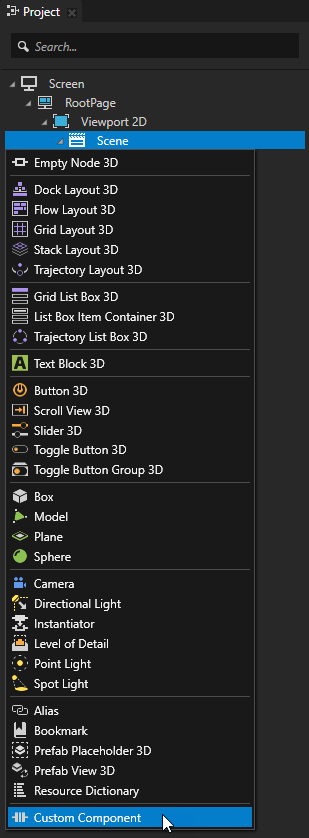
-
In the Project select a node in which you want to add your custom node, press Alt and right-click, and select Custom Component.
- (Optional) Set a custom icon for you custom node. See Setting icons for custom node types.
-
(Optional) By default Kanzi Studio adds custom properties as frequently used properties to the nodes of the type for which you created the property type. To set the node types for which Kanzi Studio suggests the property, and whether Kanzi Studio adds the property automatically or lets the user add it, set the
metadata.host attribute. See host.
Setting custom property and message types
To pass to Kanzi Studio information about the custom property types and messages you create in a Kanzi Engine plugin, you declare metadata about them. The metadata enables Kanzi Engine plugin users to interact with the plugin content in Kanzi Studio. See Reference for showing Kanzi Engine plugin custom types in Kanzi Studio.
For example, to create the metadata for the custom property type VideoFileNameProperty to allow Kanzi Studio user to select a video file:
PropertyType<string> VideoView2D::VideoFileNameProperty(kzMakeFixedString("VideoView2D.VideoFileName"), "video.mp4", 0, false,
			KZ_DECLARE_EDITOR_METADATA
			(
			// Set the name of the property the way you want to show it in Kanzi Studio.
			metadata.displayName = "Video Filename";
			// Set the tooltip for the property.
			metadata.tooltip = "Video file to be played";
			// Set the category under which this property type is listed in the Properties.
			metadata.category = "Video";
			// Set the editor you want the user to use to edit the value of this property type.
			// BrowseFileTextEditor editor contains a text box with a Browse button next to it.
			metadata.editor = "BrowseFileTextEditor";
			// Set the default value of the property in Kanzi Studio.
			// The Kanzi Engine default value is set in the first line of this example.
			metadata["DefaultValue"] = "video.mp4";
		));
When the user adds a new VideoView2D node, Kanzi Studio
adds to the properties of the node in the category Video the Video Filename property, which has a text editor with a Browse button, a tooltip in the name of the property, and the value set to video.mp4.

Property type names cannot contain:
- A period (.) in the beginning or at the end of a property name
- Spaces
- Tabs
- Slashes (/)
- Backslashes (\)
- Hashes (#)
- Opening or closing braces ({})
- At signs (@)
Setting icons for custom node types
Kanzi Studio uses a default icon  for the node types you create in a Kanzi Engine plugin. To make it easier for Kanzi Studio users to visually keep track of the nodes in the Project, you can set custom icons for your nodes.
To set a custom icon for your node type:
- In Visual Studio open the Visual Studio solution for your project in <KanziWorkspace>/Projects/<ProjectName>/Application/configs/platforms/win32.
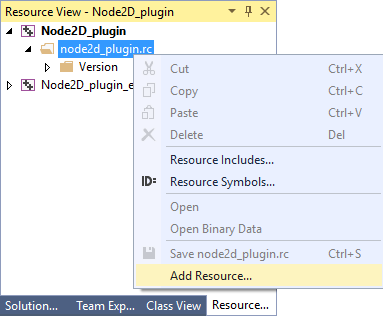
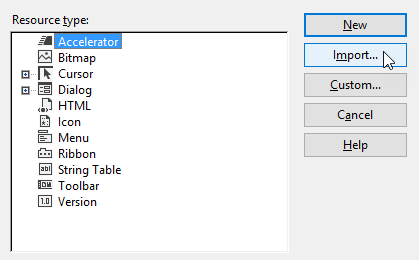
- In the Solution Explorer double-click the Resource File (<ProjectName>.rc) of your plugin project to open the Resource View, right-click the selected .rc folder, select Add Resource, and import the .ico file you want to use as the icon for your node.
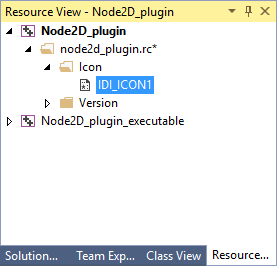
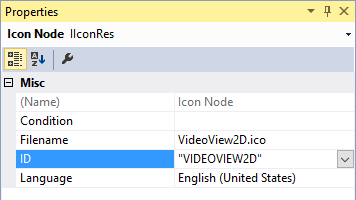
- In the Resource View in the folder named Icon select the icon you imported and in the Properties set the ID of the icon resource to the name of your node type in all caps inside double quotes.
For example, if your node type is VideoView2D, set ID to "VIDEOVIEW2D".
- Copy the .dll files of the plugin to the same location where the previous version of the plugin is located.
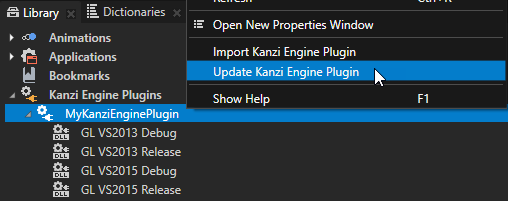
-
In Kanzi Studio in the Library > Kanzi Engine Plugins right-click the plugin you have updated and select Update Kanzi Engine Plugin.
When Kanzi Studio loads the new version of the plugin, it shows changes in the properties and classes defined in the plugin.
For an example with a custom icon set for custom node type VideoView2D, see Node2D plugin example.
See also
Creating Kanzi Engine plugins
Using Kanzi Engine plugins
Reference for showing Kanzi Engine plugin custom types in Kanzi Studio
Node2D plugin example
Node3D plugin example

Open topic with navigation